Creating and configuring spots
Explains how to create spots。
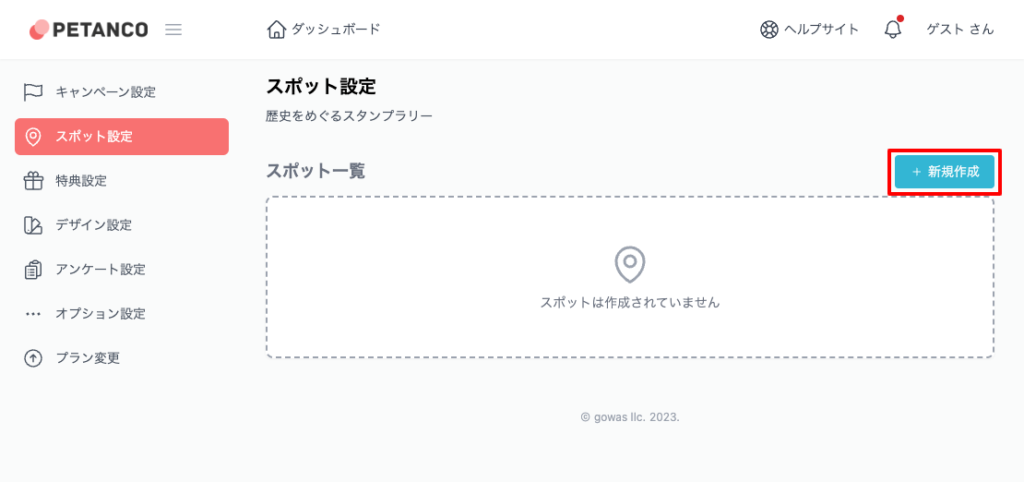
Create a new spot
Click the "Create new" button to the right of the spot list title on the spot setting screen to move to the creation screen.。
Input spot information
The spot creation and editing screen is divided into the following components:。
- Public settings:Spot public status、Set the category that comes with spots。
- System information:Set the spot stamp mode and publication period.。
- Content information:Set spot summary information。
- spot map:Set the spot location information。

Public settings
This section explains the settings related to publishing spots.。
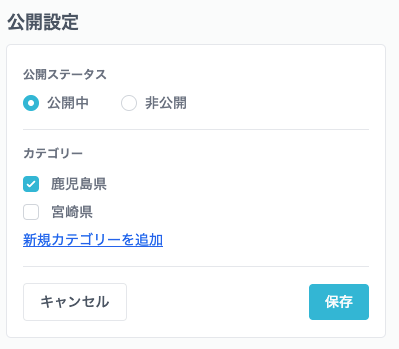
Publication status
Public status allows you to set public settings for the spot.。
Anyone can view it if it is "currently available"。If you say "private" it will no longer be able to view。however、Administrators can view it in preview mode even when it is private。
Category
Check the category to which the spot belongs。
If you need a category but haven't created one yet、Please create a category in "Category Settings" on the "Spot Settings" page.。
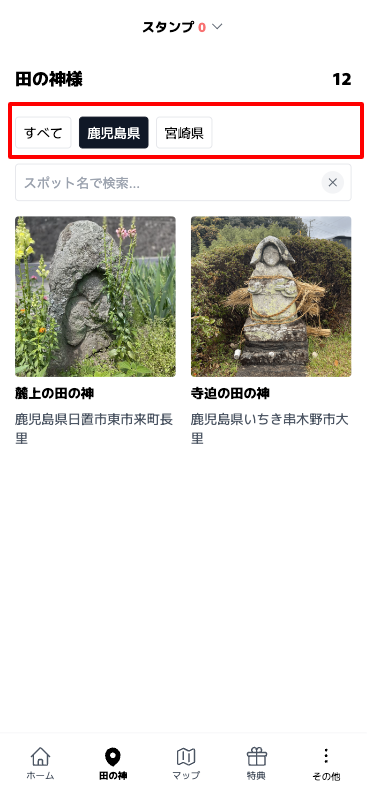
For a list of spots with categories set, the category menu will be displayed as shown below.。
System information
This section explains the system information settings.。
Stamp Mode
In stamp mode、Set how to get stamps。QR code mode、GPS mode、keyword mode、quiz mode、You can choose from QR+GPS mode。
The stamp mode set on the stamp settings page is displayed as (default)。
It is possible to change the stamping method for each spot。

QR code mode
Selecting QR code mode、Access from QR code and stamp。The special QR code required to obtain stamps can be downloaded from the created spot page.。

GPS mode
Selecting GPS mode、Stamp using the device's GPS (location information)。Please specify the stampable range (radius) from 300 meters to 5,000 meters in 100 meter increments.。
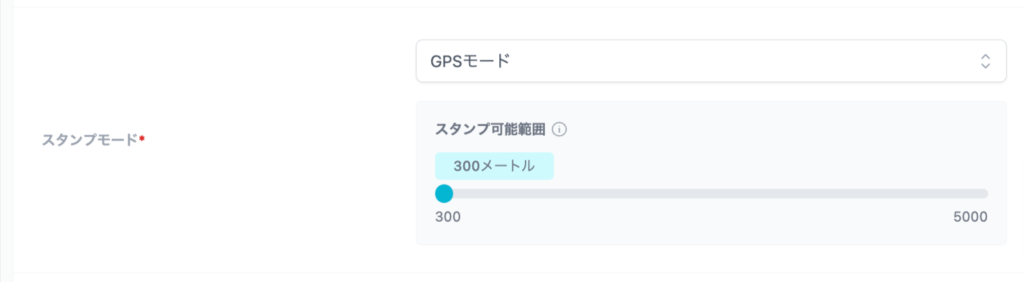
When GPS reception is poor, such as indoors,、Because GPS errors can range into hundreds of meters,、It is set from 300m with plenty of room.。Please note。
keyword mode
Selecting keyword mode、Earn stamps by entering answers to questions。Questions and answers are set in spots。
When the stamp method is set to "Keyword"、The question text and answer input fields will be displayed.。

Think of questions that are easy to answer。
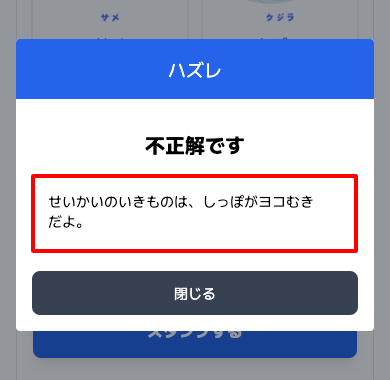
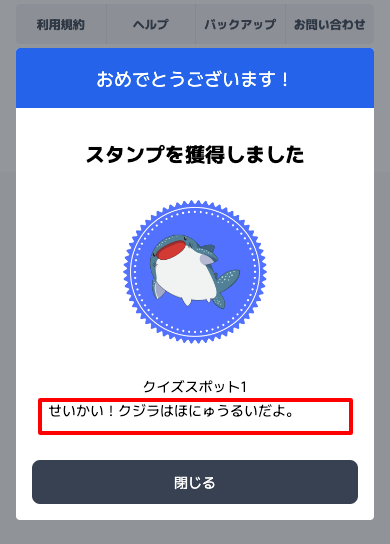
quiz mode
When the stamp method is set to "Quiz"、You can set the question text and up to 4 answer choices.。
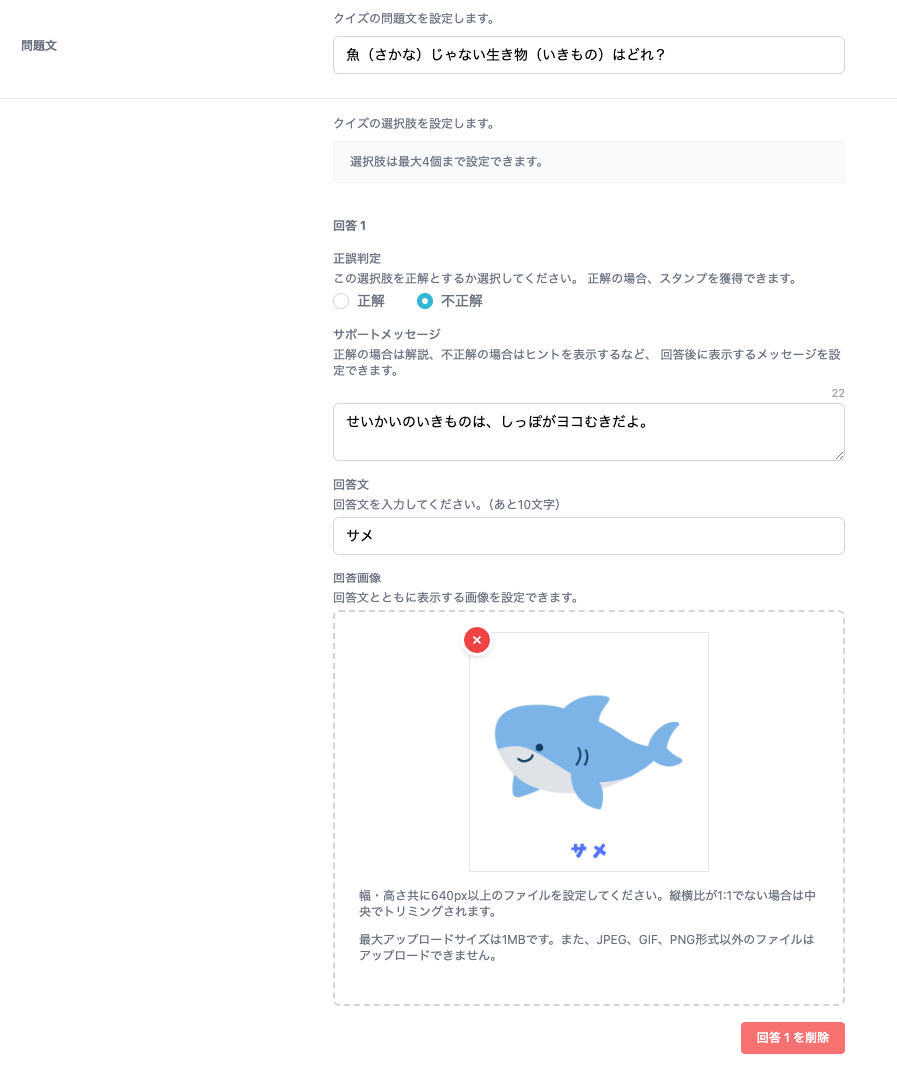
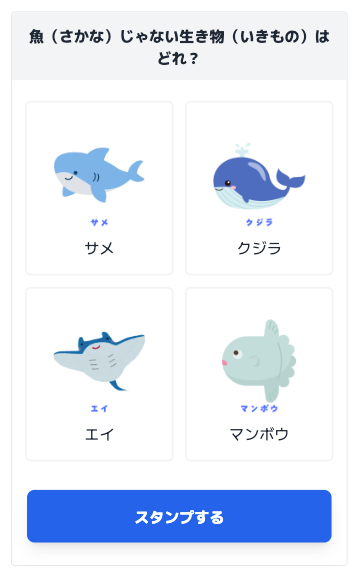
Tips and explanations
You can set hints and explanations in the "Support Message" field for each answer.。
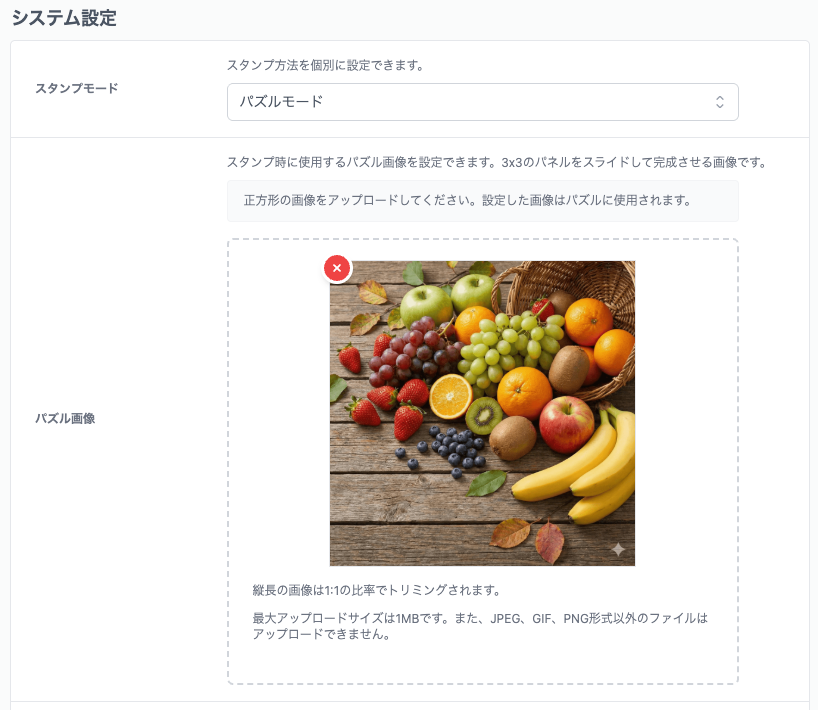
puzzle mode
3When you clear the ×3 slide puzzle、You can earn stamps。
No need to read QR code or check GPS、Can be easily used for online events that are not restricted by location.。
This is the perfect system for stamp projects that can be completed online.。
Puzzle + QR code mode
Puzzle mode via QR code。
QR+GPS mode
QR+GPS mode is、This is a stamp method that uses both QR code and GPS.。Stamps can only be stamped if the terminal is within the stampable range that you set while accessing from the QR code.。This mode is effective in preventing fraudulent acquisition of stamps.。
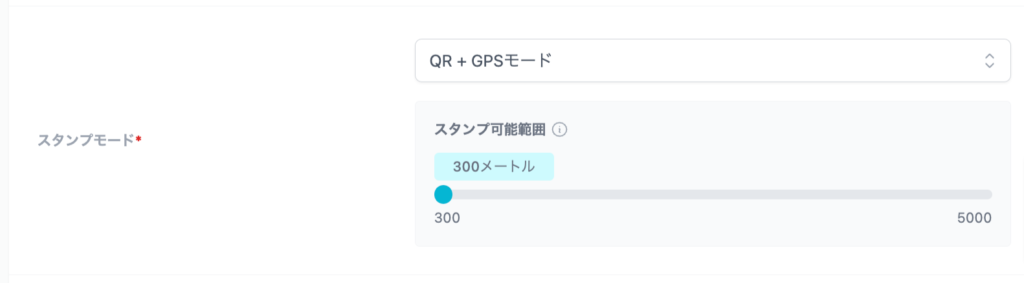
When GPS reception is poor, such as indoors,、Because GPS errors can range into hundreds of meters,、It is set from 300m with plenty of room.。Please note。
Number of points earned (point rally method)
Set the number of points you can earn by checking in。
0You can set points between。

Number of stamps obtained (stamp card method)
Set the number of stamps you can get by checking in.。
0You can set stamps between 100 and 100.。

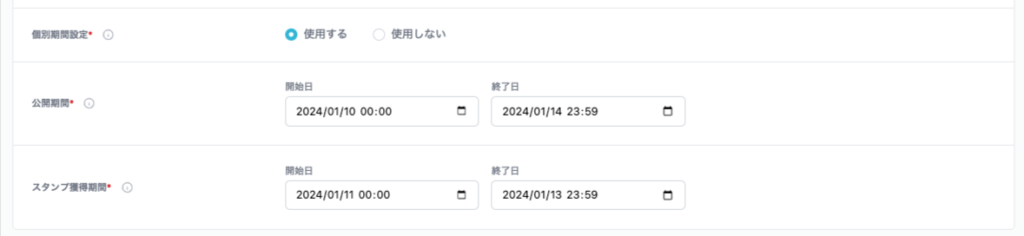
Individual period settings
You can set the release period and stampable period for each spot by overwriting the period settings set in the campaign.。
Content information
This section explains the content information settings.。
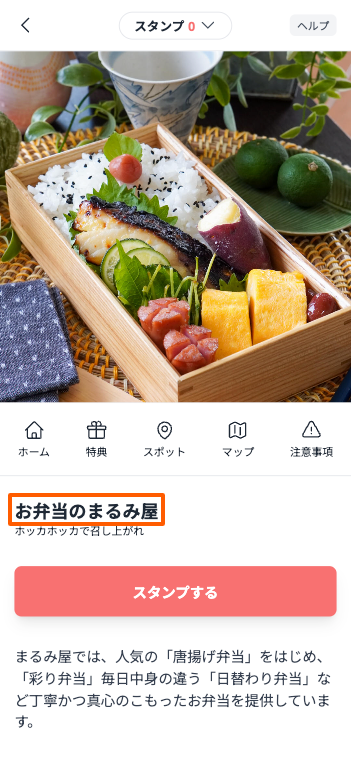
Spot name
Enter the name of the spot。

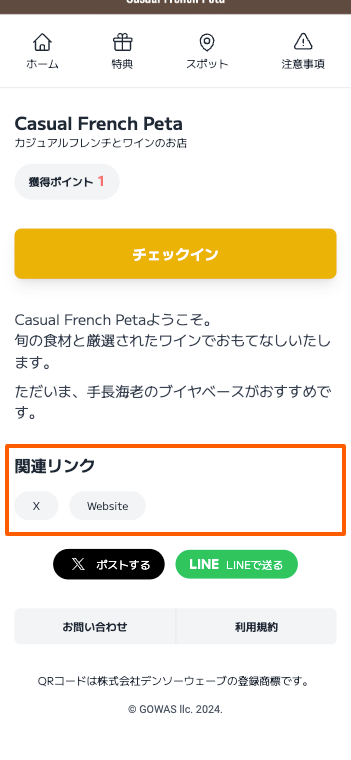
This is what it looks like on the public site:。"The part surrounded by the red frame"
Catch copy
Fill in the catchphrase for the spot。There are no particular rules regarding the content.、Depending on the case, please enter the details depending on the project content, such as the address.。

This is what it looks like on the public site:。"The part surrounded by the red frame"

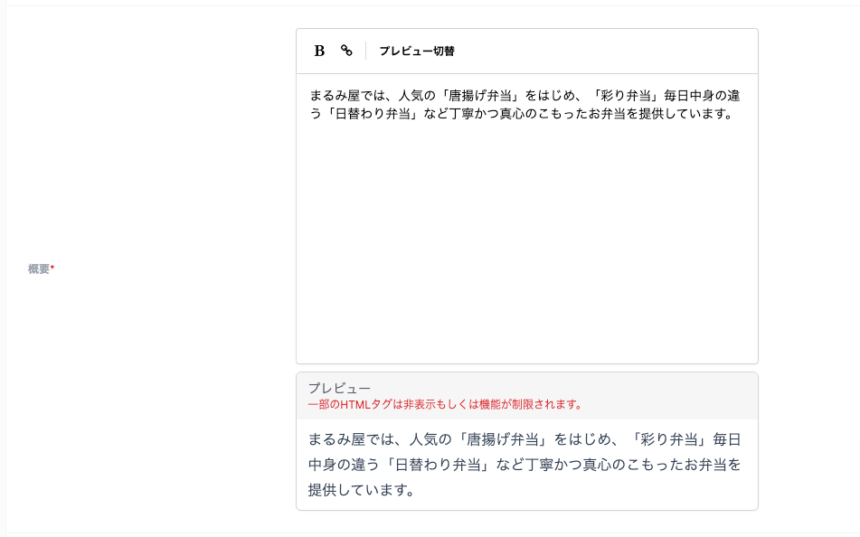
overview
In the overview、Fill in the outline of the spot。The outline can be decorated with some characters。
How to decorate the lettersText decoration on the Create Campaign pagePlease refer to the。
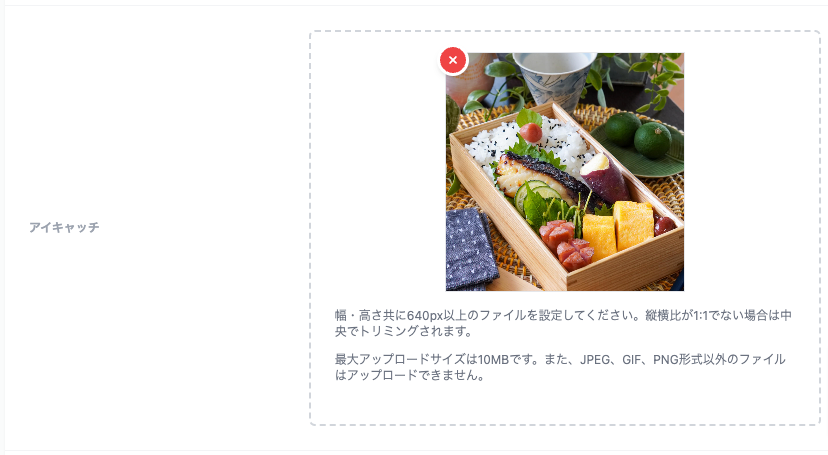
eye catch
Eyecatch is an image displayed on the spot page。
Please set the file to be at least 640px in width and height.。Vertical image is 1:1It will be trimmed with。
Maximum upload size is 1MB。Also、JPEG、GIF、Files other than PNG format cannot be uploaded。
View image annotations
You can set whether to display image annotations for disclaimer。
By default it is "Show"。
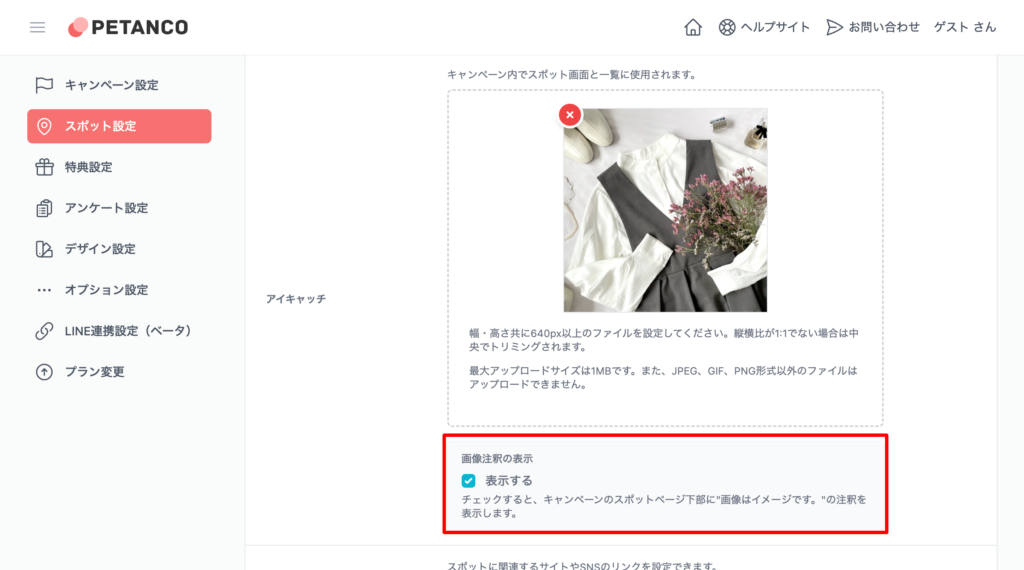
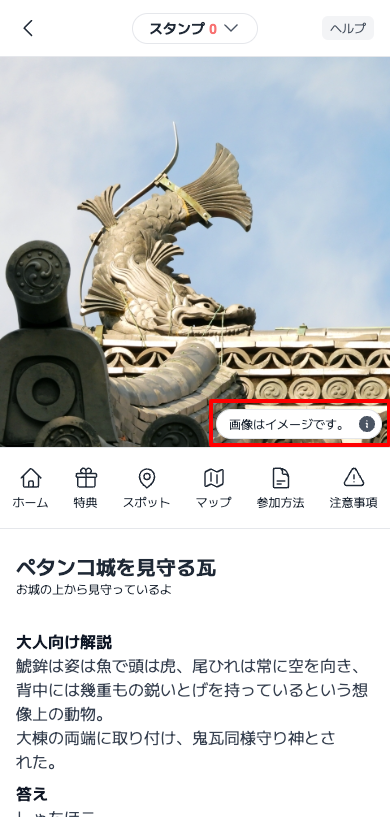
If you check "View" the image is for illustrative purposes only.。”Annotations will appear at the bottom of the image.。
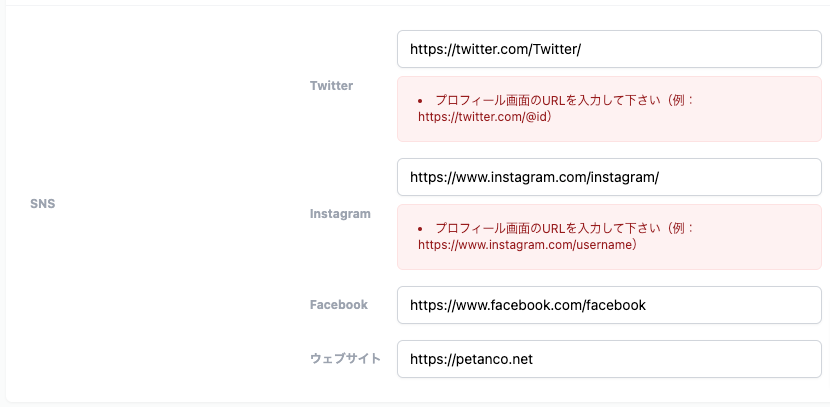
SNS
On social media、Set up related links for social media and websites。Please enter a URL related to the spot。
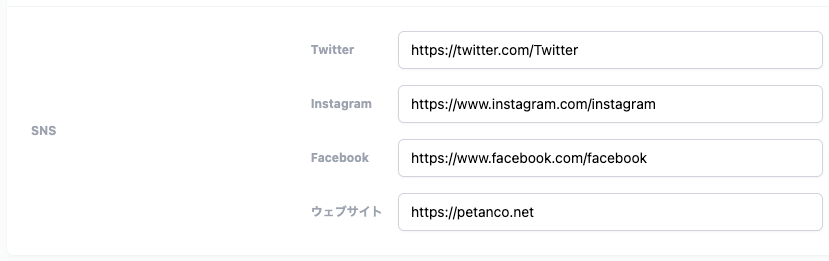
This is what it looks like on the public site:。"The part surrounded by the red frame"
SNS
At the end of Twitter and Instagram URLs「 / 」An error will be displayed if。At the end “ / Please delete。
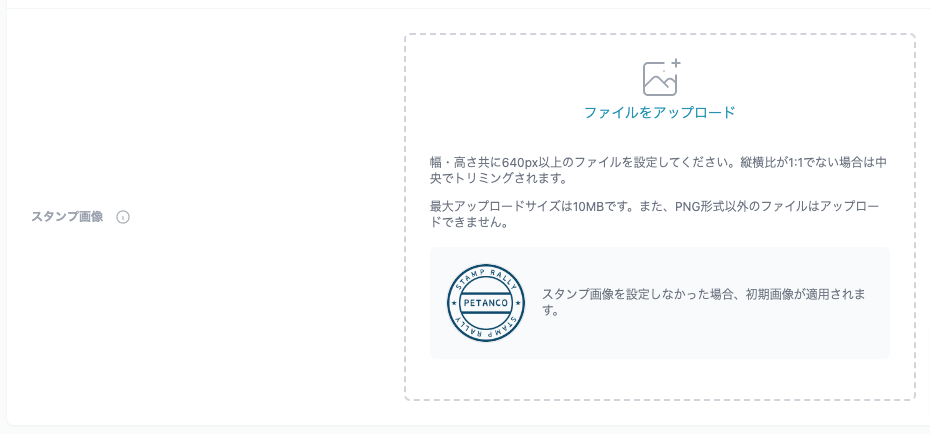
Stamp image (stamp rally method)
You can set an original stamp image。This takes precedence over the "default stamp image" on the campaign page.。
spot map
This section explains the settings for the spot map.。
Map display
In map view、Display the coordinates of the spot on the map。Select "Show" to display the map。

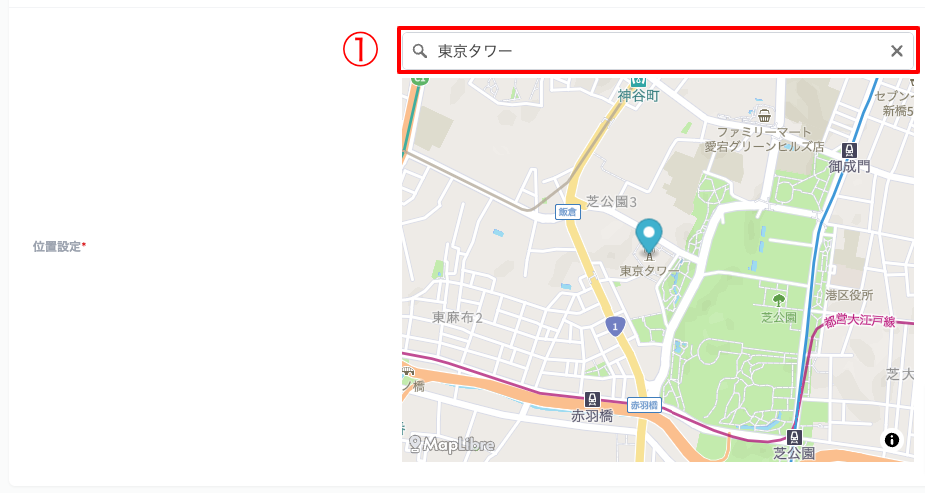
location settings
In position settings、Set the location of the spot with coordinates。
Enter “address” or “facility name” in “Search field ①” at the top of the map.、"Coordinates (latitude,longitude)” to set a marker on the map.。
If the correct position cannot be obtained、Drag markers directly&Please drop and fine-tune the position.。
Also used for GPS location information
When the stamp acquisition method is set to "GPS" or "QR code + GPS"、The position of the marker is the starting point for acquiring stamps.。
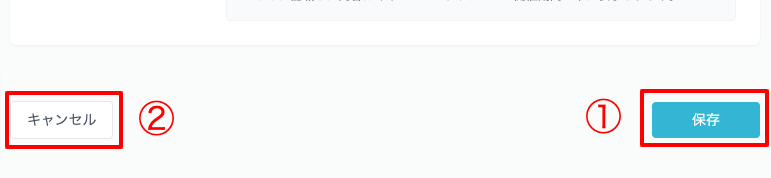
Save and cancel
Once the input is complete、Click the "Save ①" button at the bottom of the page to complete。
If you want to cancel the input contents,、Click the "Cancel ②" button。